Creating Buy Buttons In Shopify
Please Note: You'll first need to add products to the client's Shopify store. For more info on that, check out Importing Products (Design & Build).
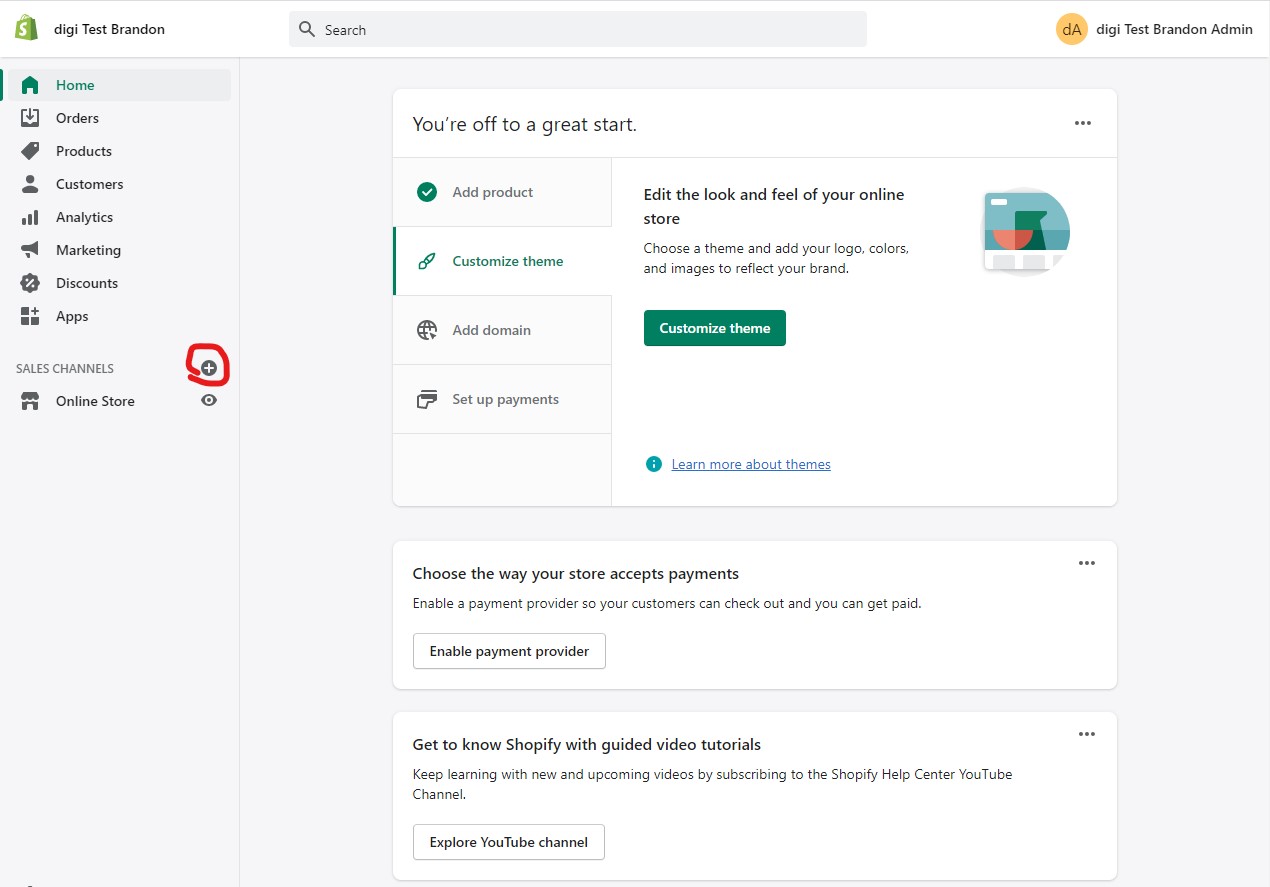
First, you'll need to create a Buy Button. To do so, you'll need to add the Buy Button option to the Sales Channels. To accomplish this, click the + icon beside the Sales Channels group title in the menu on Shopify.
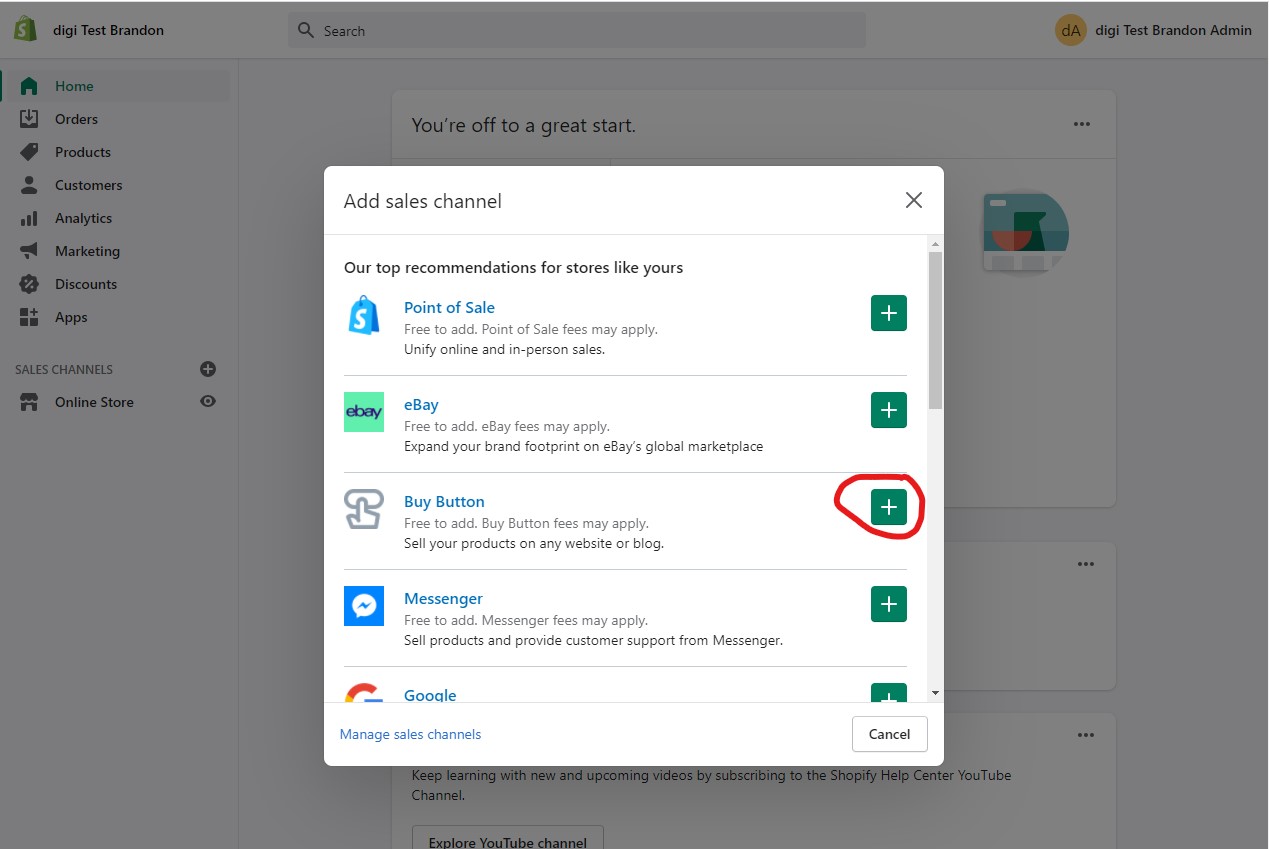
In the modal that pops up, select Buy Button.
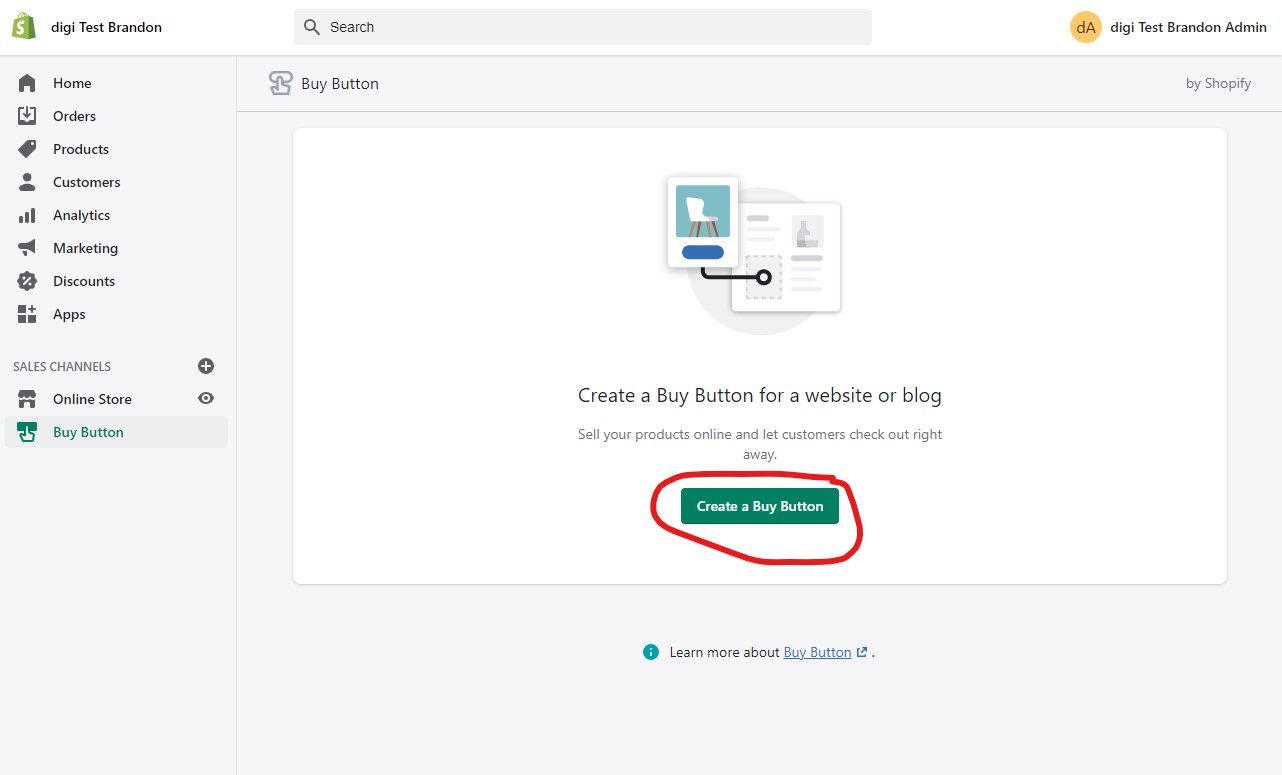
For the sake of ultimate redundancy, you'll next need to click yet another button to add a Buy Button, a button that says "Create Buy Button."
Buy Buttons can be for either individual products or collections of products. In most cases, for our purposes, you'll be creating buy buttons for individual products which will be inserted into the body of WooCommerce product pages.
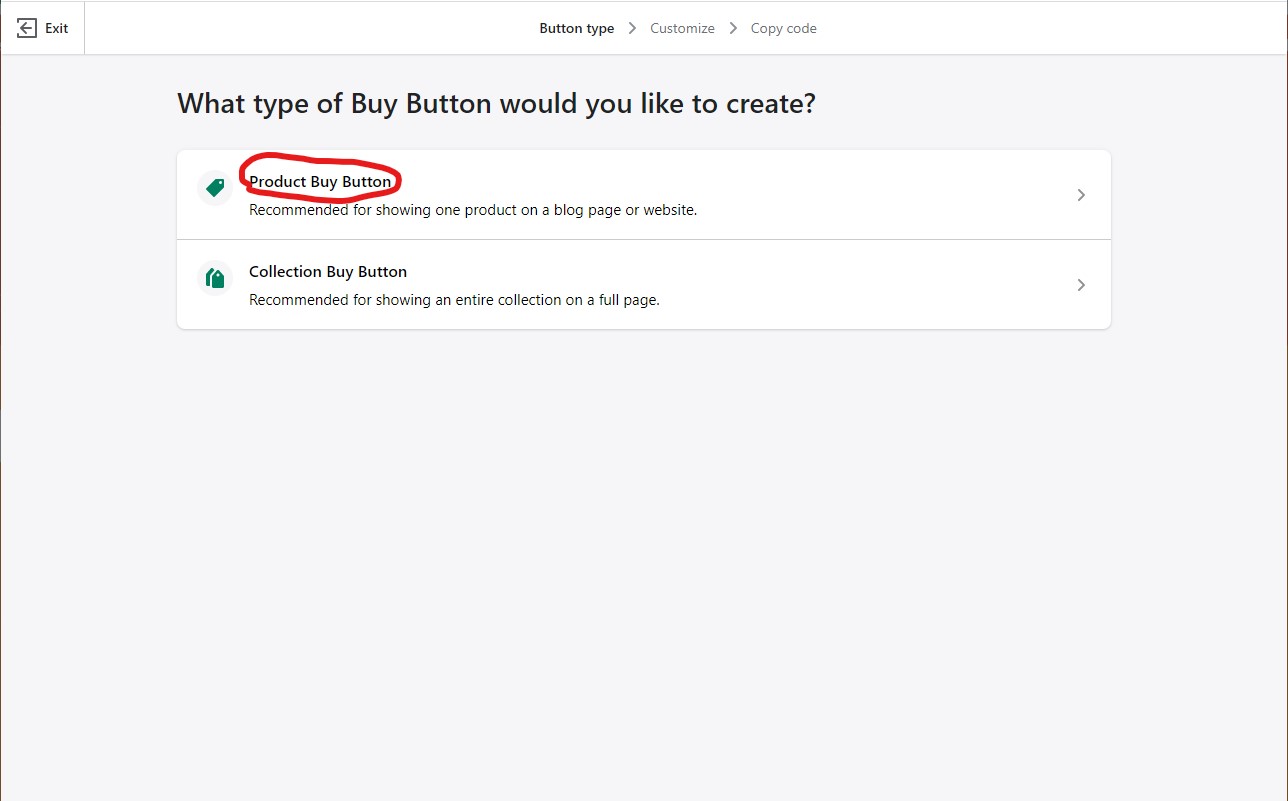
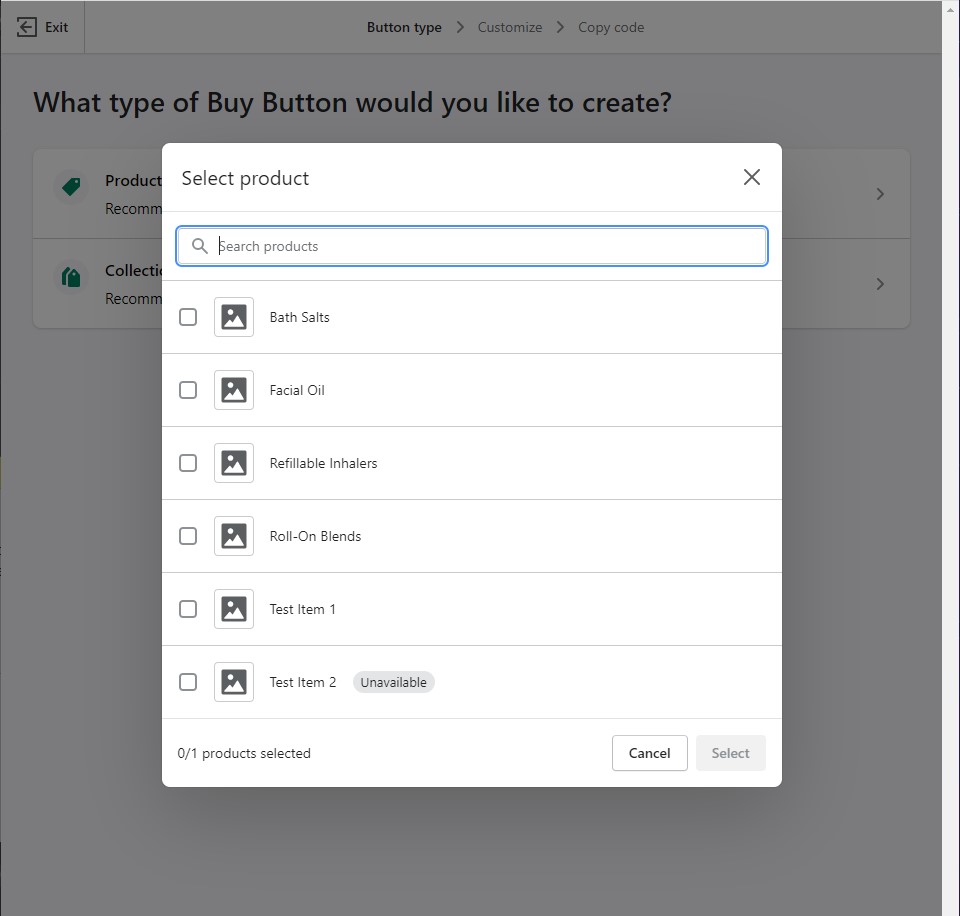
Once you select "Product Buy Button," you'll need to select the product for which you want to add a buy button. It's probably best to start from the top of the list and go down the list in order as you add a product page on the client's WordPress site for each product in this list.
After you select a product for which you want to generate a Buy Button, on the next screen, you'll have a variety of options to customize what the Buy Product window will look like. It's important to note that the end result here will be a long code which you'll embed on the site. Since it is static code, any stylization changes you make to other future buttons will not be reflected on buy buttons you've already generated. With that in mind, it's important to get the stylization right the first time to save you time in the future.
The good news is that once you set all these options for one Buy Button, the subsequent Buy Buttons that you create will retain these settings and use them by default. For example, if you choose custom colors for the button for one Product Buy Button, each Buy Button you create for other products in this store will have the same color buttons by defualt.
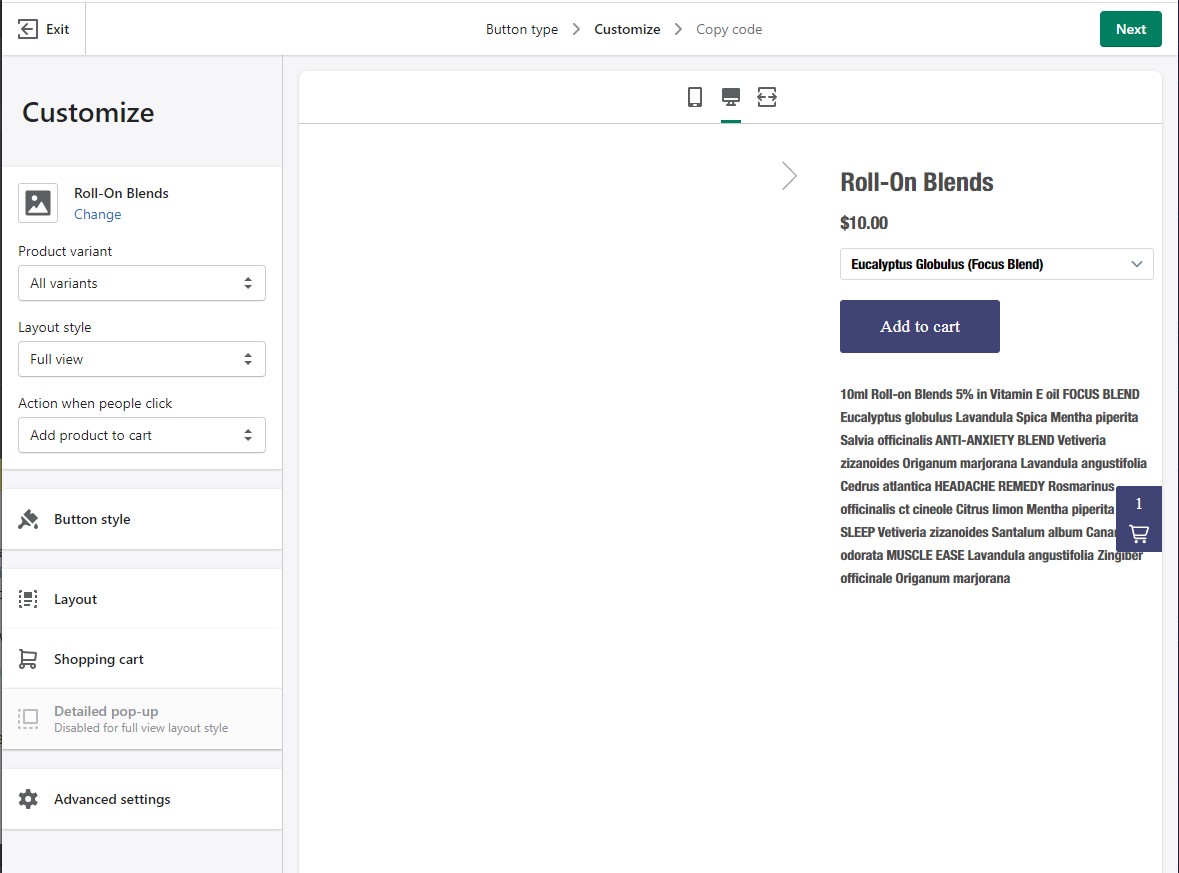
While most options relate to stylization, some options that don't relate to stylization choices include the top options: Product variant and Action when people click. Below, I've included a few helpful tips about Button options, but for a more detailed list of appearance settings and what they do, visit the "Creating a Buy Button" support article by Shopify.
- Product Variant? Each product can have one or more variants, which are like what WooCommerce refers to as "Variables." A good example is a product that is a book, the variants could be Binding (Hardcover or Paperback) and Language (English, Spanish, Czech, etc.). By default, the option All variants is selected, meaning the Buy Button will give the option to select any of the possible variants included in the product's details.
- Layout Style? The "Full view" will display the product image, variant selection menu, and the product's description. The classic view will show all these elements except for the description.
- Action When people click? Do we want the item to be added to a cart so the customer can continue shopping for other items or should we take them directly to the checkout area?
Once everything is set, click the Next button. On the resulting screen, you'll see the code for the new Buy Button. Click, the green "Copy code" button.
Activating WooCommerce
Now that you have the Buy Button code from Shopify, you'll need to add it to a product page on the client's WordPress site. First, though, you'll need to activate WooCommerce if you haven't already done so.
Create Product Pages
- Go to the client's site dashboard, locate Plugins on the main menu, find WooCommerce, and activate it. Now, you will have a Products option on the main menu of the site's dashboard.
- Under Products, click Add New. On the next screen you'll want to pay attention to only the following fields/settings:
- Name
- Body (switch to text mode and add the product code here)
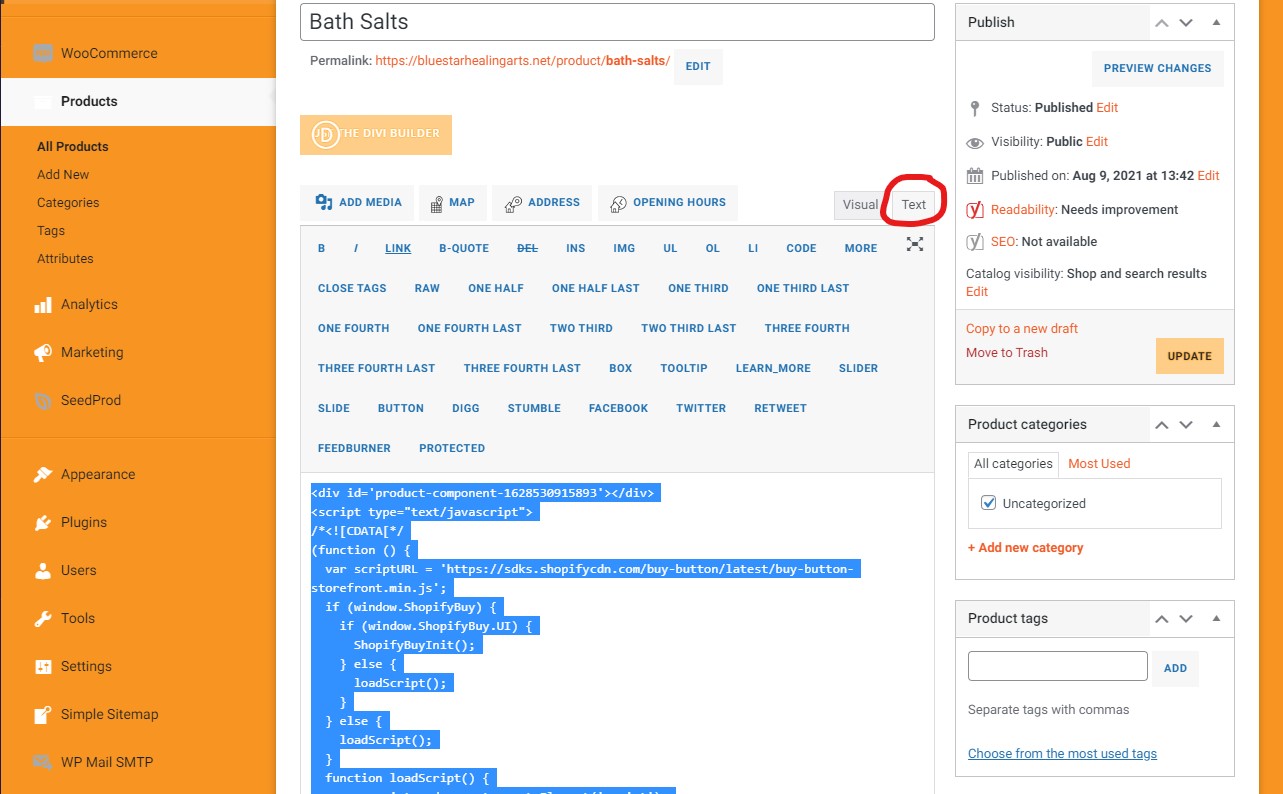
- Featured Image
- Category
- Next, you'll need to click the Publish button.
- Repeat these steps for each Buy Button.
Product Page Layout
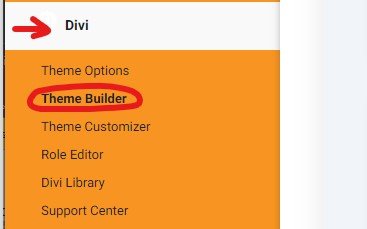
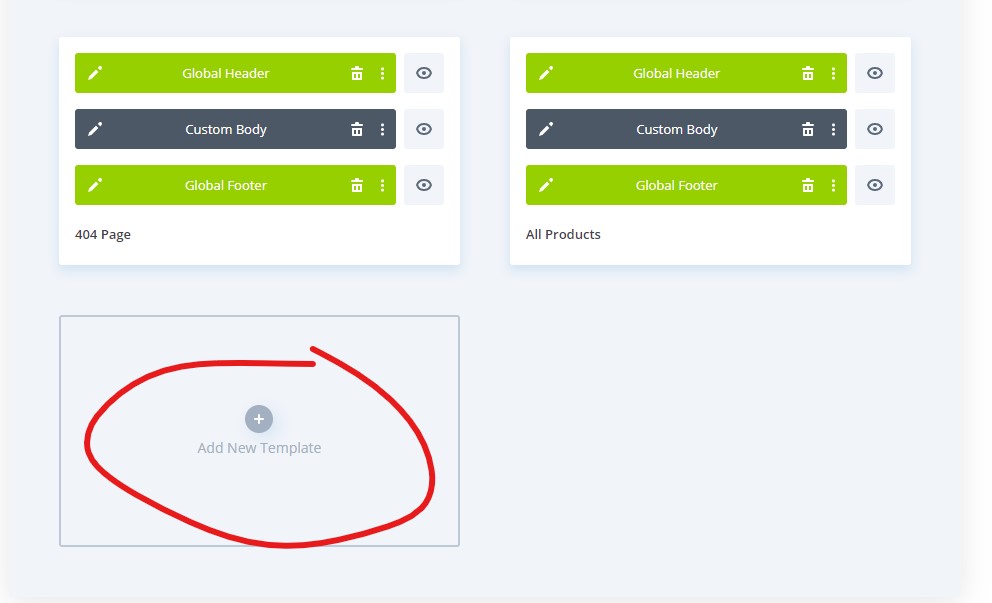
Once you have all the products added to WordPress, you'll need to create a template layout for all product pages. To do so, we'll use Divi's Theme Builder feature.
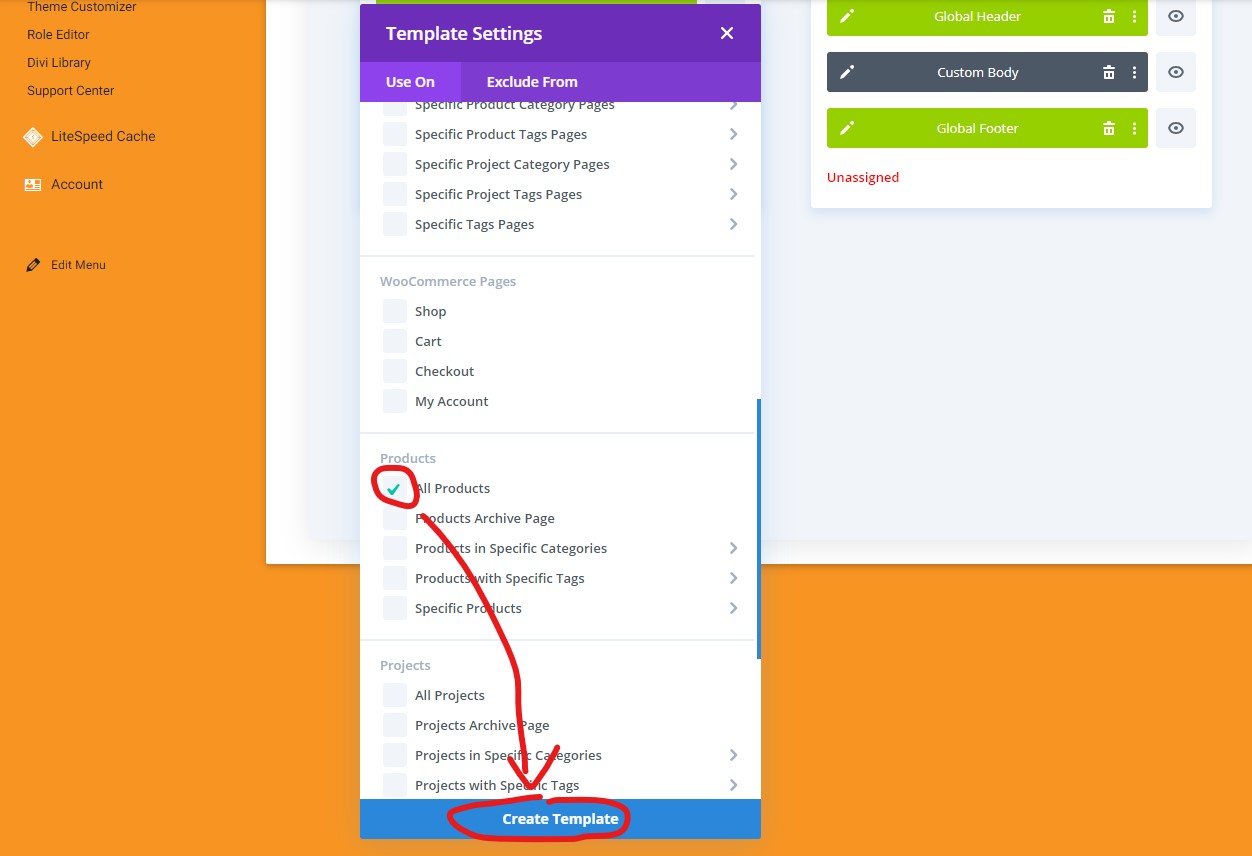
- Create Theme Builder Layout: On the client's site dashboard, click Divi, and then select Theme Builder. On the Divi Theme Builder screen, create a new layout that applies to "All Products."
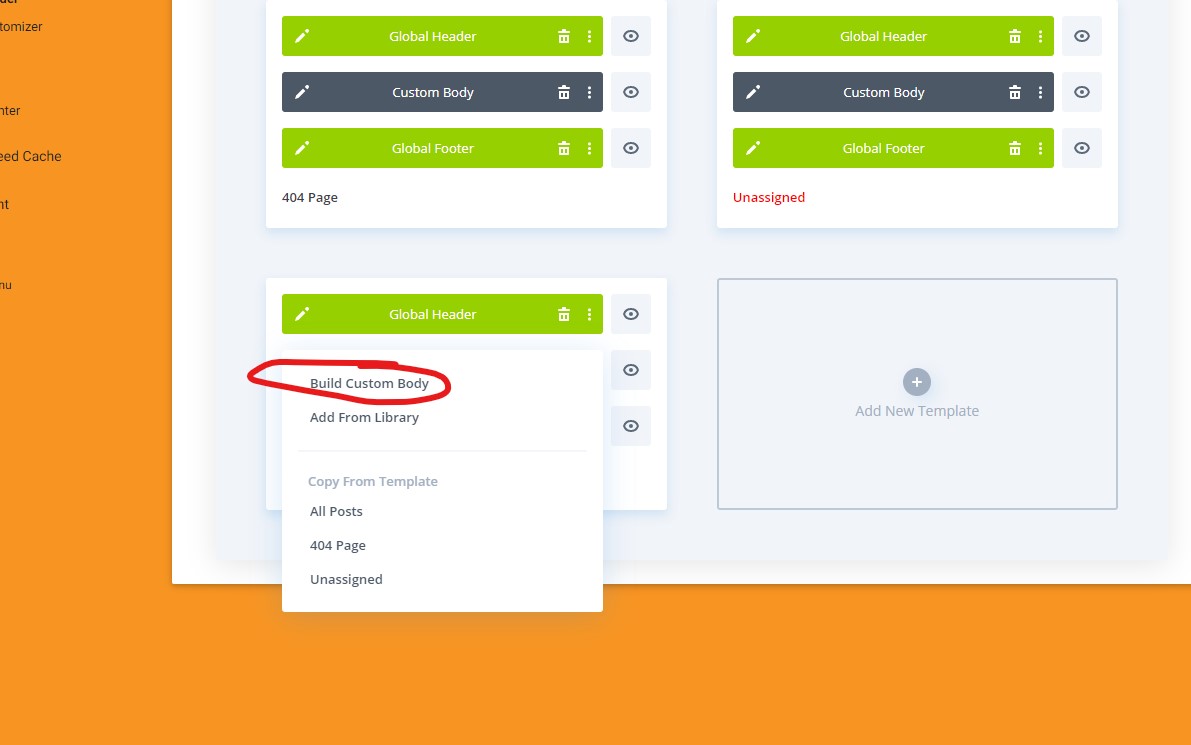
- Add Custom Body: Between the Green labels "Global Header" and "Global Footer", you'll see an area that says "Add Custom Body," click here. Next, click Build Custom Body, and then click Build from Scratch.
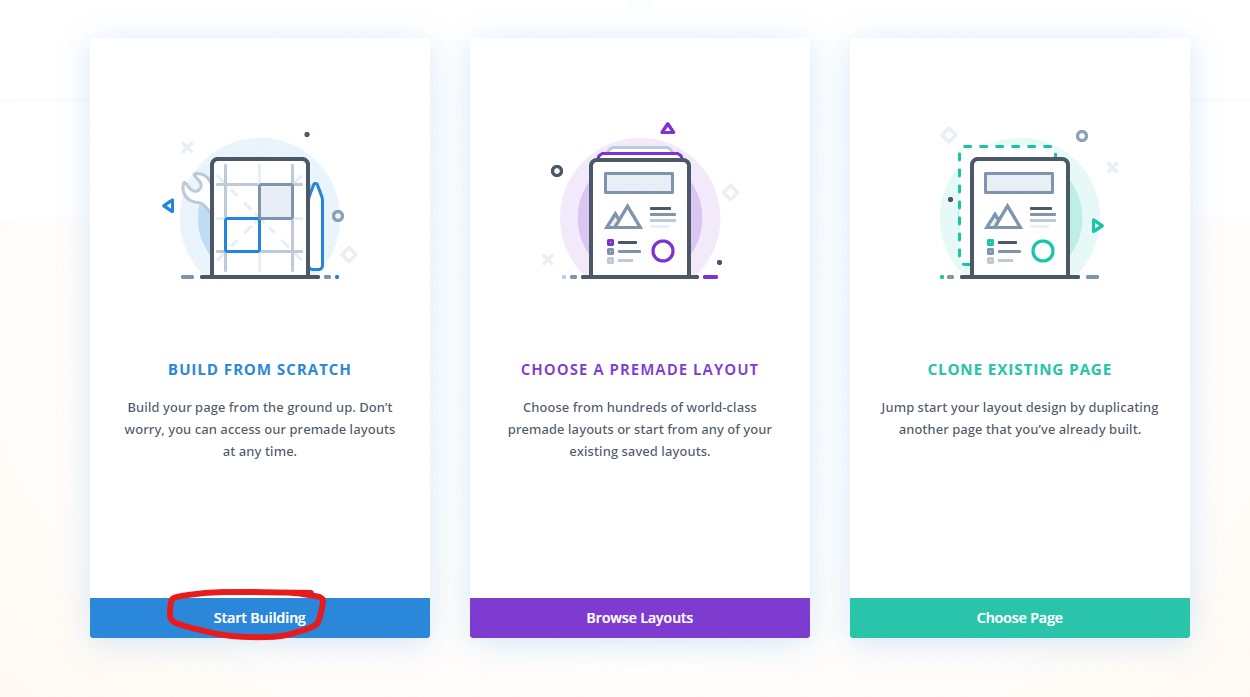
- Build From Scratch: On the next screen, choose Build From Scratch.
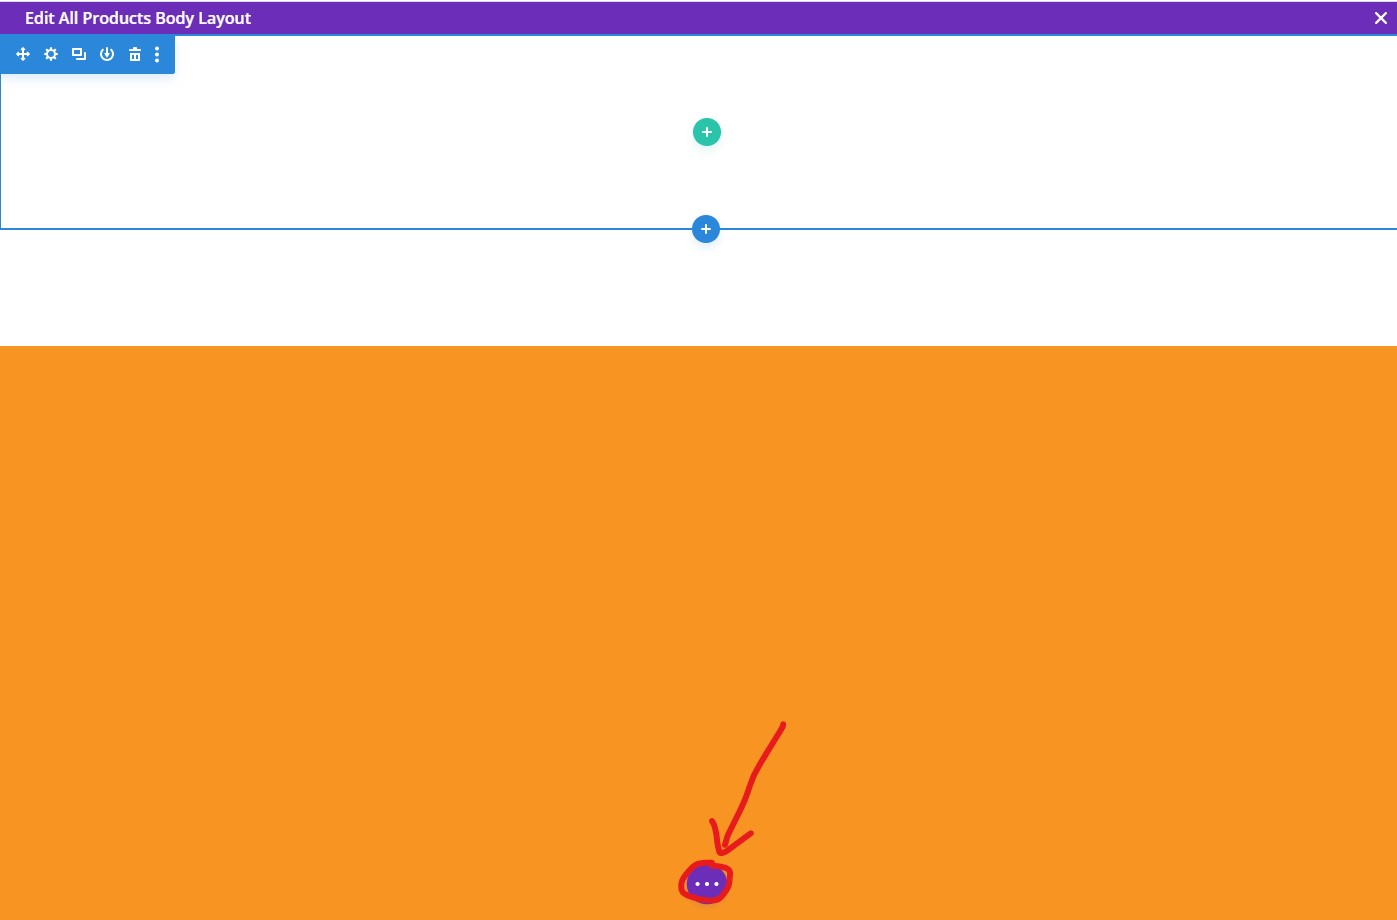
- Divi Options: Once the blank layout loads, click the purple icon at the center bottom of the screen to open the Divi menu. To speed things up, we have a JSON file you can import for the custom body for the All Products template you just created.
- Import Layout: Next, click the last option (an up and down arrow) from the Divi menu. A modal will appear titled "Portability." Click the Import tab on the modal, then click the "No File Selected area to upload a file.
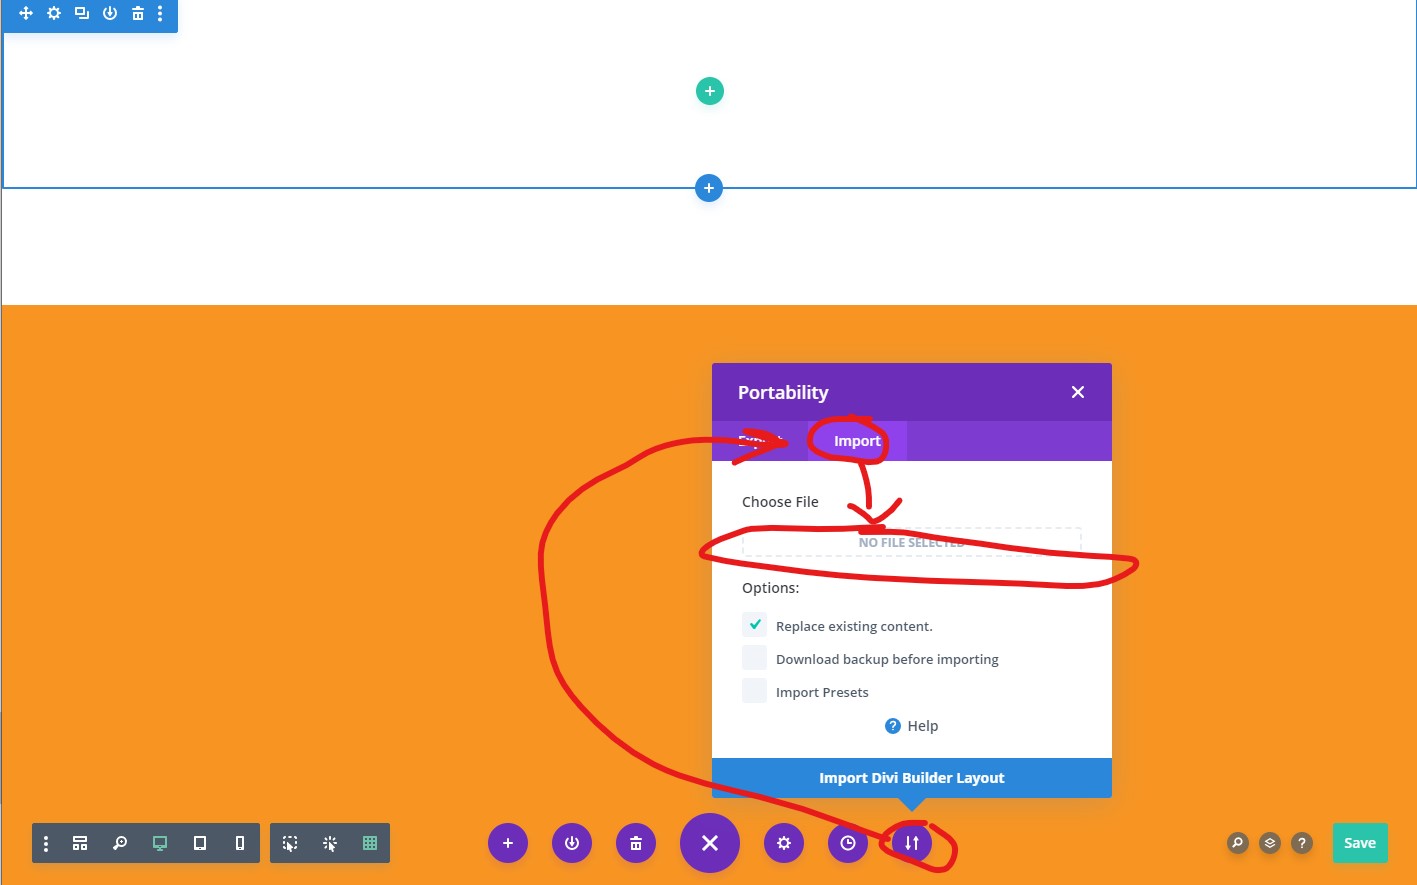
- Import Layout: Navigate to Shared Drives > Design Assets > Website Templates and open the file "AllProductsLayoutShopify-Powered.json." Once you select this file, be sure the option "replace existing content" is selected, disregarding the other two options on the Portability modal. Click the blue button, "Import Divi Builder Layout."
- Save the Layout in the builder screen by clicking the green Save button or pressing CTRL+S. You'll be returned to the Theme Builder screen where you'll also need to click the save button near the top.
Store/Shop Page
Once you have all the products added to WordPress, you'll want to make sure there is a page that displays all the items. The best way to accomplish this is to use Divi's Theme Builder feature to create a template layout for all Products.