Adding a Variable Product
Set the Product Type
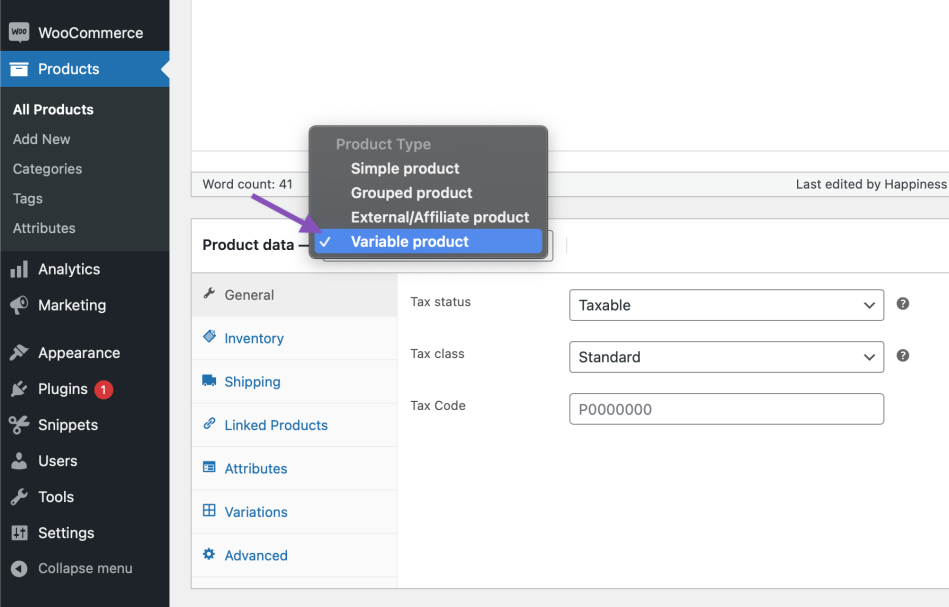
To add a variable product, create a new product or edit an existing one.
- Go to: WooCommerce > Products.
- Select the Add Product button or Edit an existing product. The Product Data displays.
- Select Variable product from the Product Data dropdown.
Add Attributes to Use for Variations
In the Attributes section, add attributes before creating variations — use global attributes that are site-wide or define custom ones specific to a product.
Global Attributes
To use a global attribute on your product:
- First create a global attribute.
- Then you can choose said global attribute from the dropdown and select Add.
- Choose Select all to add all values from to the variable product (if applicable).
- Most importantly select the Used for variations checkbox to use these for variations.
- Select Save attributes.


Custom Attributes
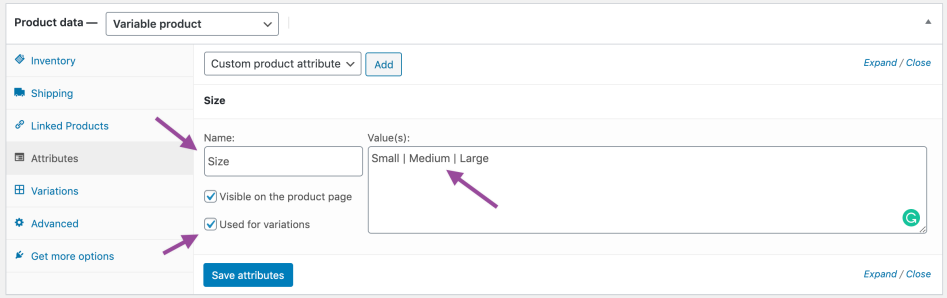
To add a new attribute specific to this product:
- Select Custom product attribute and click Add.
- Name the attribute (e.g., Size).
- Set values separated by a vertical pipe,
|(e.g., Small | Medium | Large). - Enable the Used for variations checkbox.
- Select Save attributes.

Add Variations
With attributes created and saved to add a variation, go to the Variations section in the Product data meta box.
Manually Add a Variation
- Select Add variation from the dropdown menu, and select Go.
- Select attributes for your variation. To change additional data, click the triangle icon to expand the variation.
- Edit any available data. The only required field is Regular Price.
- Select Save changes.
Creating All Possible Variations
Select Create variations from all attributes to have WooCommerce create every possible combination of variations from your attributes and their values and select Go:
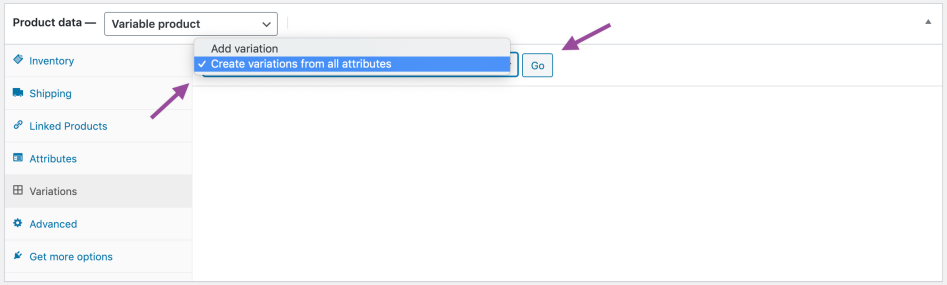
It will create a new variation for each and every possible combination of variation attributes (max 50 per run). If you have more possible combinations you can run it again.
For example, if you have two attributes – color (with values blue and green) and size (with values large and small) it creates the following variations:
- Large Blue
- Large Green
- Small Blue
- Small Green
Note: If you later add additional attributes, it may require the variables to be redefined for the variation combinations to work correctly. Also, be aware of this selection functionality/behavior when using more than 30 variations.
Editing Many Variations
If you have more than 15 variations, use the buttons to navigate forward and backward through the list. Each time you navigate to a new set of variations, the previous set is saved. This ensures that all changes are saved.
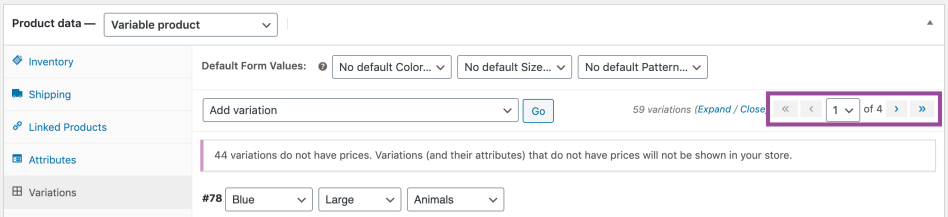
Setting Defaults
Set defaults you prefer on variations. In the example, no default form values were set, so users can pick any color and size right away from the product page.

If you want a certain variation already selected when a user visits the product page, choose the default form values. This also enables the Add to Cart button to appear automatically on variable product pages.
You can only set defaults after at least one variation has been created.
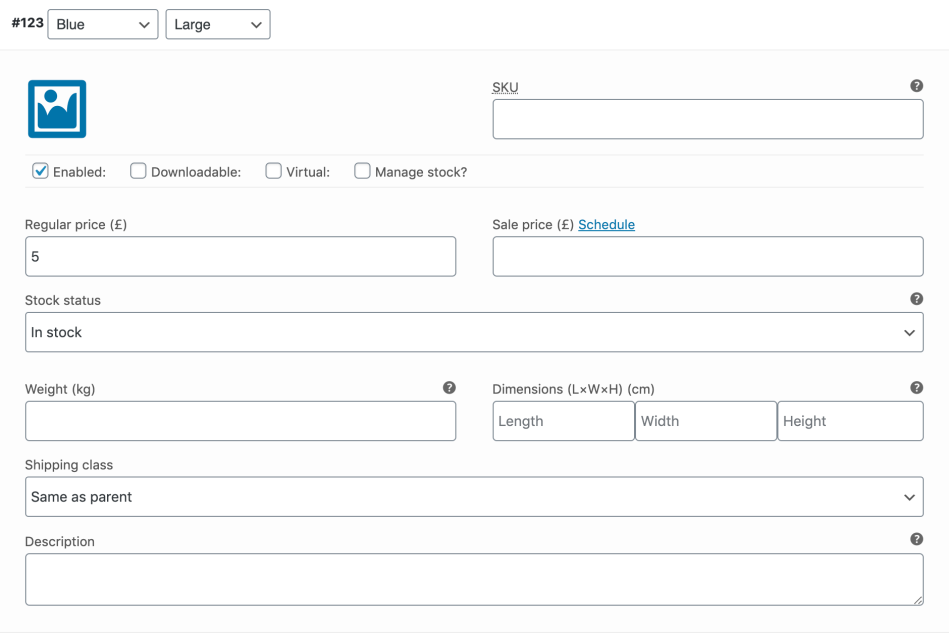
Adding Variation Data
Each variation can have the following properties.
General
- Enabled – Enable or disable the variation.
- Downloadable – If this a downloadable variation.
- Virtual – If this product isn’t physical or shipped, shipping settings are removed.
- Regular Price (required) – Set the price for this variation.
- Sale Price (optional) – Set a price for this variation when on sale.
- Tax status – Taxable, shipping only, none.
- Tax class – Tax class for this variation. Useful if you are offering variations spanning different tax bands.
- Stock quantity – Shows if Manage stock? is selected. Allows to set the current stock level for the variation.
- Allow backorders? – Shows if Manage stock? is selected. Allows to set if backorders are allowed for the variation; if enabled, stock can go below zero.
- Low stock threshold – Shows if Manage stock? is selected. When the stock for the variation reaches this level you will get a notification email. If not set, the product-wide threshold will be used (see Inventory Management below).
- Downloadable Files – Shows if Downloadable is selected. Add file(s) for customers to download.
- Download Limit – Shows if Downloadable is selected. Set how many times a customer can download the file(s). Leave blank for unlimited.
- Download Expiry – Shows if Downloadable is selected. Set the number of days before a download expires after purchase.
Inventory Management
Inventory for variable products can be managed on product and variation level.
Сhoose how to manage stock by toggling Enable stock management at product level on the Inventory tab:
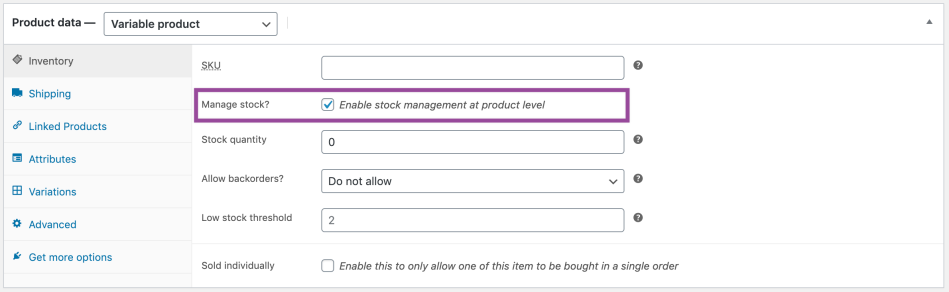
The following settings are available if you choose to manage stock on a product level:
- SKU – If you use SKUs, set the SKU or leave blank to use the product’s SKU.
- Manage Stock? – Tick the box to manage stock at the variation level.
- Stock Quantity – Shows if Manage Stock is selected. Input the quantity. Stock for the specific variation, or left blank to use the product’s stock settings.
- Allow Backorders – Choose how to handle backorders.
- Low stock threshold – When the stock for the variation reaches this level you will get a notification email.
- Sold Individually? – Allow only one to be sold in one order. (This setting is used for the product itself. You cannot set a specific variation to only be sold once per order)
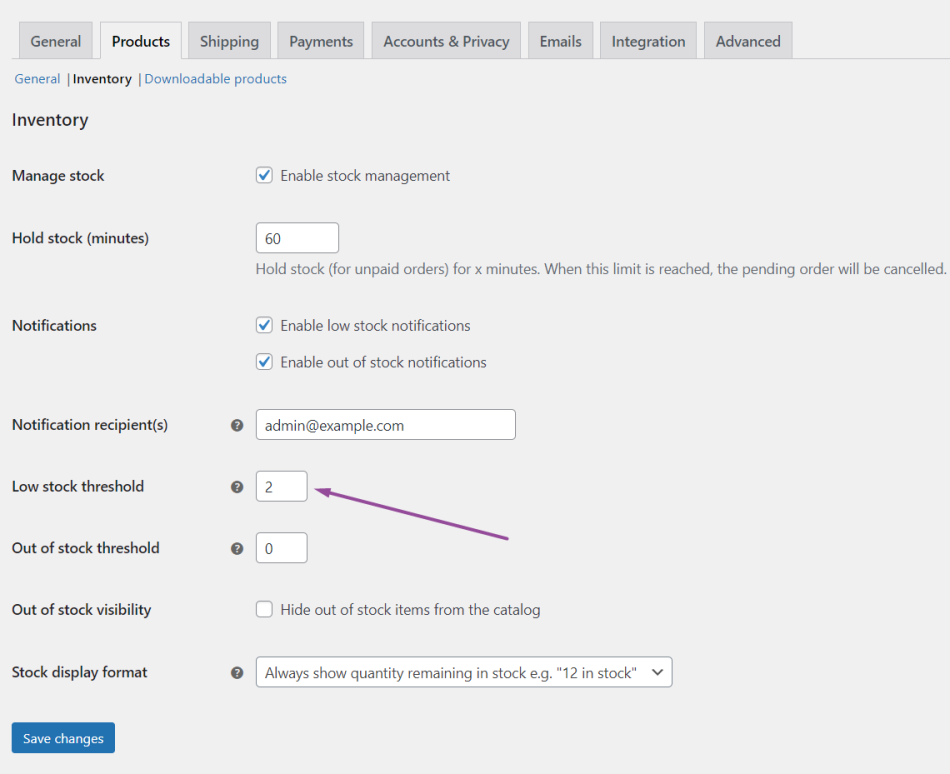
If Low stock threshold isn’t set then the store-wide default will be used. This default can be set in the Products – Inventory tab of WooCommerce settings:
Choosing to manage stock for variations individually allows you to edit the same properties for each variation.
Set Stock Status can be applied to all variations at once to In stock or Out of stock. Bulk-update under Variations:

Shipping
- Weight – Weight for the variation, or left blank to use the product’s weight.
- Dimensions – Height, width and length for the variation, or left blank to use the product’s dimensions.
- Shipping class – Shipping class can affect shipping. Set this if it differs from the product.
Linked Products
- Upsells
- Cross-sells
- Grouped
If the SKU, weight, dimensions, and stock fields are not set, then it inherits values assigned to the variable product. Price fields must be set per variation.
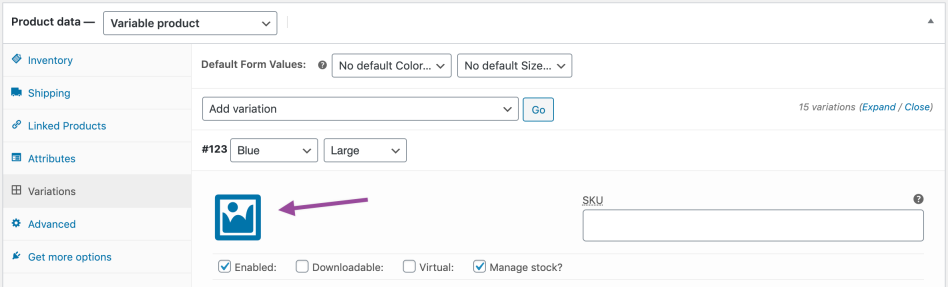
Add an Image to the Variation
- Expand the variation.
- Click the blue image placeholder (screenshot).
- Select the image you wish to use.
- Save.
Bulk Editing
You can bulk-edit variations by selecting the specific piece of data you want from the dropdown. In this example, I want to edit prices for all variations:

What Customers See
On the frontend, when viewing a variable product, the user is presented with dropdown boxes to select variation options. Selecting options will reveal information about the variation, including available stock and price.

If the user tries to click the greyed out add to cart button before choosing an attribute, a message will appear asking them to select some attributes.
In the product archive page, Add to Cart does not display because a variation must first be chosen before adding to cart on the product page.

Functionality / behavior for more than 30 variations
If a product has more than 30 possible variations, then the customer will first have to select all available attributes before they can see if a product has stock or is available.
For example, if you have a Hoodie, available in five sizes and three colors, this produces 125 variations (five to the power of three). If you removed five of these variations, the customer would still be able to select that from the front-end but they wouldn’t see this wasn’t available until they selected the Add to cart button.