In this article, we will explain how the shipping process works, and how to print labels. It covers the functionalities like UPS real-time shipping rates, shipping labels, live UPS tracking, and much more.
The installation of this functionality has already been installed and set-up by our web developers.
Here is how it works:
- Fetches Real Time Shipping Rates:
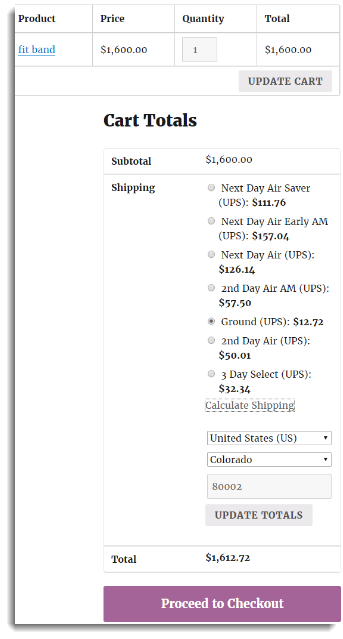
Woocommerce UPS shipping enables one to fetch shipping rates directly from UPS so that there is no need to manually go to the website and check every shipment’s shipping rate. Suppose we go to the WooCommerce UPS plugin-enabled website, let us select a product and then place an order. On placing an order, we get to the cart page, where we can see the “Calculate Shipping” button. On giving address details, the plugin sends this information to the UPS. And for a particular sender and recipient address, the UPS returns the possible shipping services with their rates. The flow can be explained as follows:
Place an order with valid recipient address –> the plugin requests the UPS for appropriate rates –> the UPS responds with various services and rates applicable for this order –> customer can see these services & rates on the cart page. This whole process is referred to as – Fetching of real-time rates. In the snapshot below, we can see that, based on the address, the UPS has returned the shipping rates and services.
Print UPS Shipping Label
You can print the label in PNG or GIF format based on the UPS Configuration settings.
How to create a UPS Shipment label?
- Navigate to Dashboard > WooCommerce > Orders.
- On the order page, click #OrderNumber for which you want to create and print the label.
- Click on Generate Packages. It will generate a package based on the Parcel Packing Method that you have set up in the plugin settings.
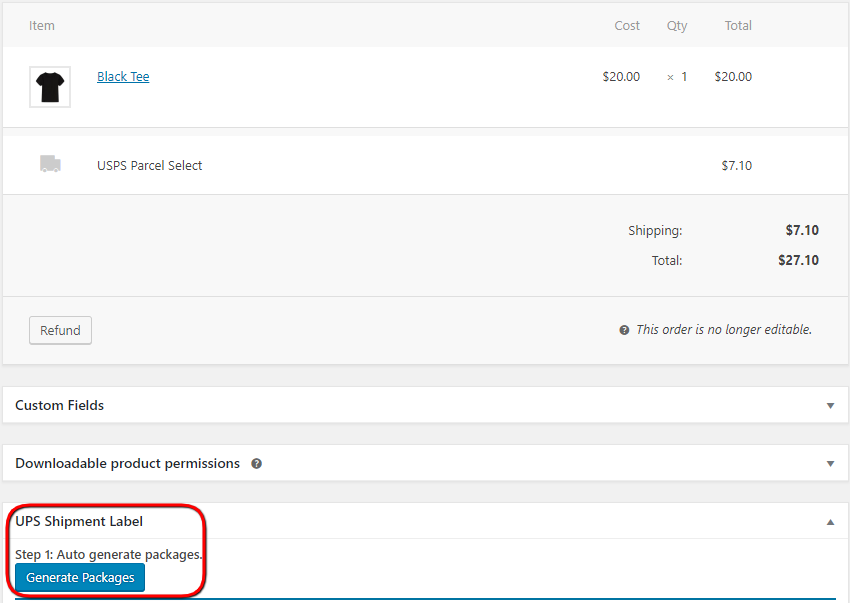
- Once the package is successfully created, the following options will be available to you.
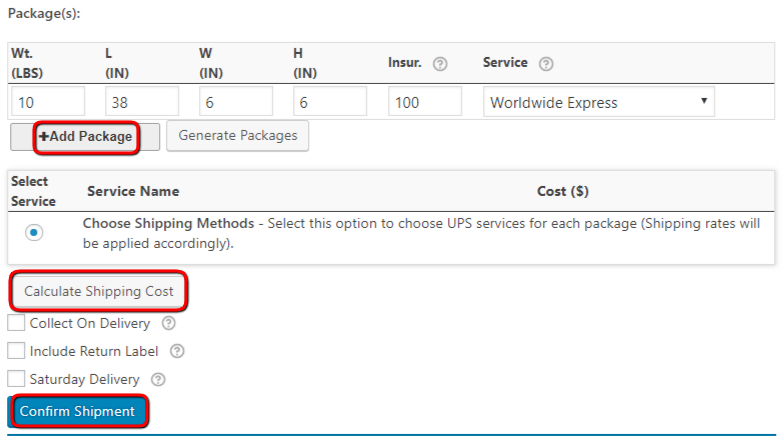
- Add Package: This allows you to manually add packages to your the order.
- Calculate Shipping Cost: It allows you to calculate real-time shipping rates on the order page in order to compare different shipping rates and assign shipping services to the packages. This way you can compare shipping rates and generate shipping labels of any available shipping service for the destination address.
- Collect On Delivery: This allows you to enable UPS Collect On Delivery option for the current order.
- Include Return Label: This allows you to print a Return Shipment Label for the current order.
- Saturday Delivery: This option allows you to make the order eligible for the Saturday Delivery.
- Confirm Shipment: Once you are done with the packages, click on Confirm Shipment in order to generate UPS shipping label for the current order.
After clicking the Confirm Shipment button, shipment tracking ID automatically gets generated in the tracking box. Print Label and Return label buttons become available for printing.
How to print a UPS Shipping Label?
After clicking on Confirm Shipment, the following screen appears:
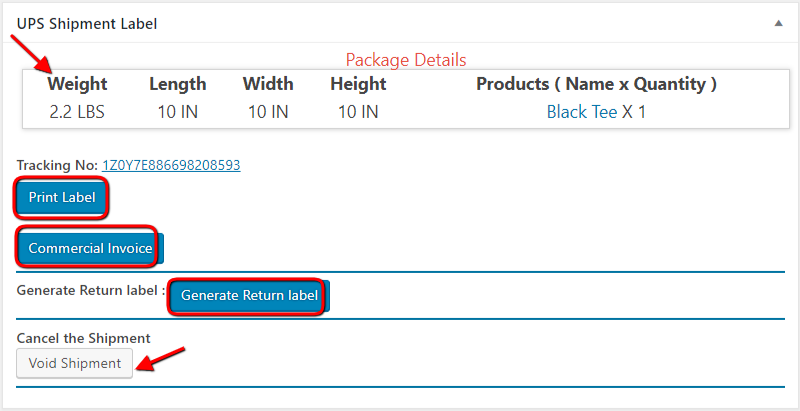
- Package Details: The plugin allows you to know exactly how the products are packed inside the package by displaying the package details with the name and the quantity of the products inside each package.
- Print Label: Click Print Label to print the label for the order.
- Generate Return Label: Click Generate Return Label to generate and print the label with destination address as the address of the shop owner and origin address as the address of the customer.
- Commercial Invoice: If enabled in the plugin settings, the plugin lets you generate a Commercial Invoice for all your international shipments.
- Void Shipment: In case the order gets canceled, you can click on the Void Shipment option.
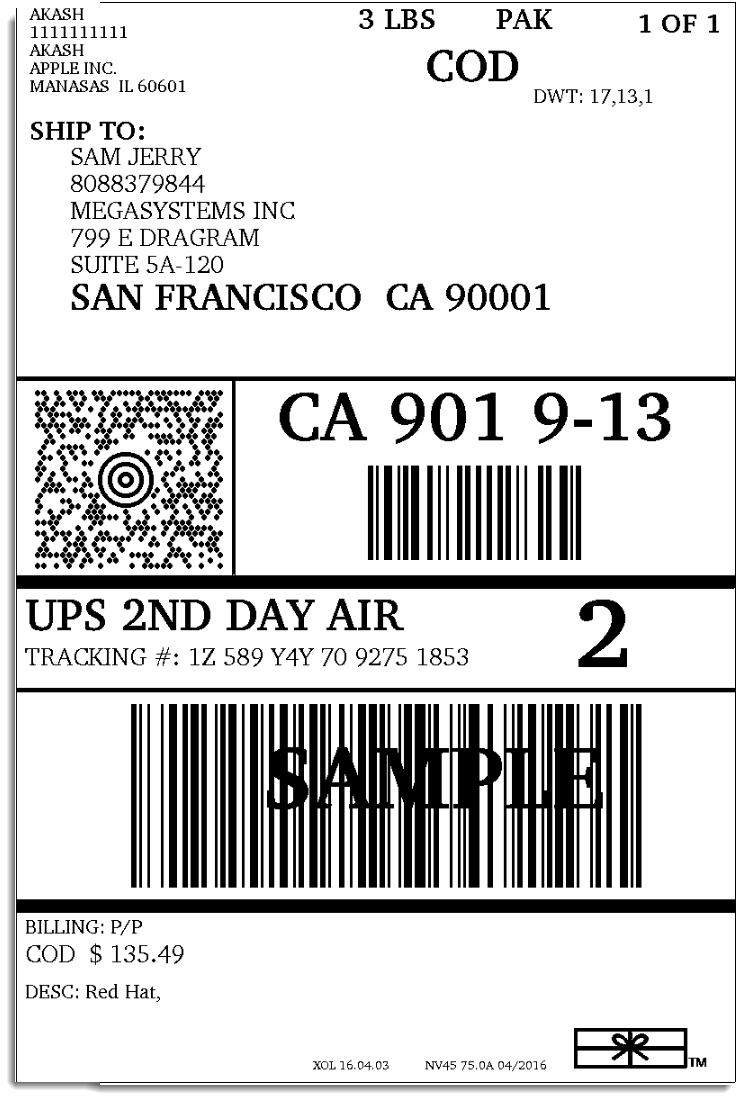
Sample UPS Shipping Labels
All created shipment labels get stored in your host site database. All these labels are auto downloaded in a file and can be printed multiple times. If you are using Test API mode, you will get the Sample Domestic Shipment Label is as shown below. For the real label printing, select the Live API mode in the plugin Admin Settings.
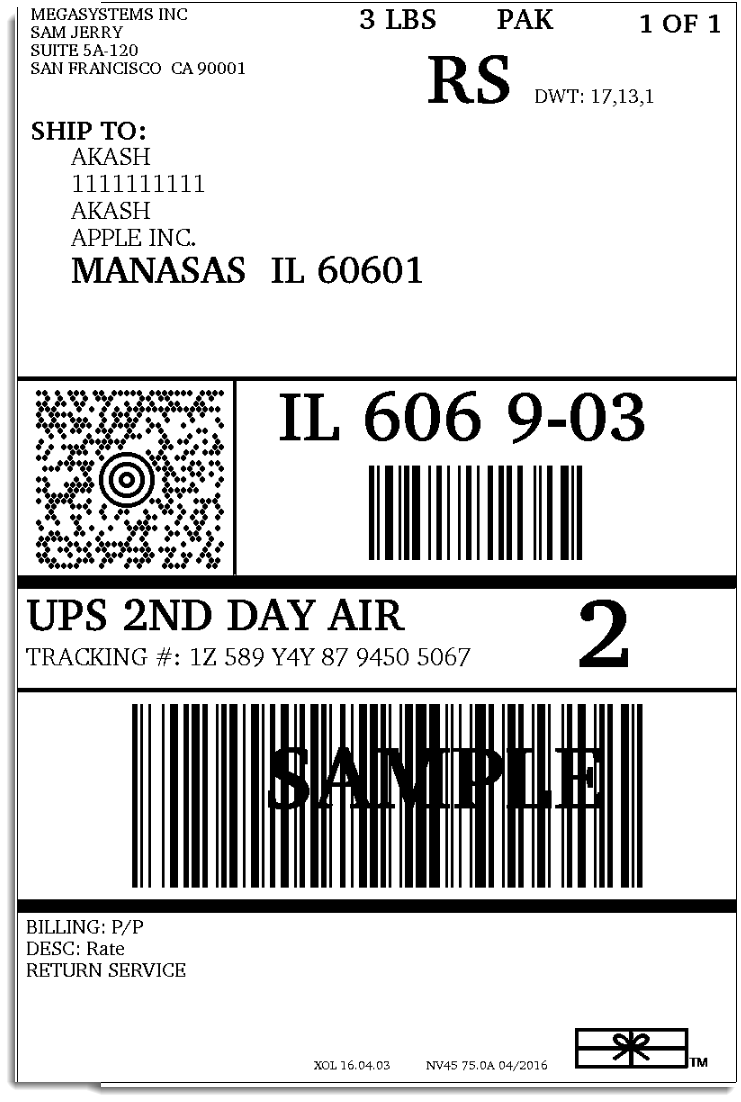
The sample UPS Shipment Return Label is as shown below:
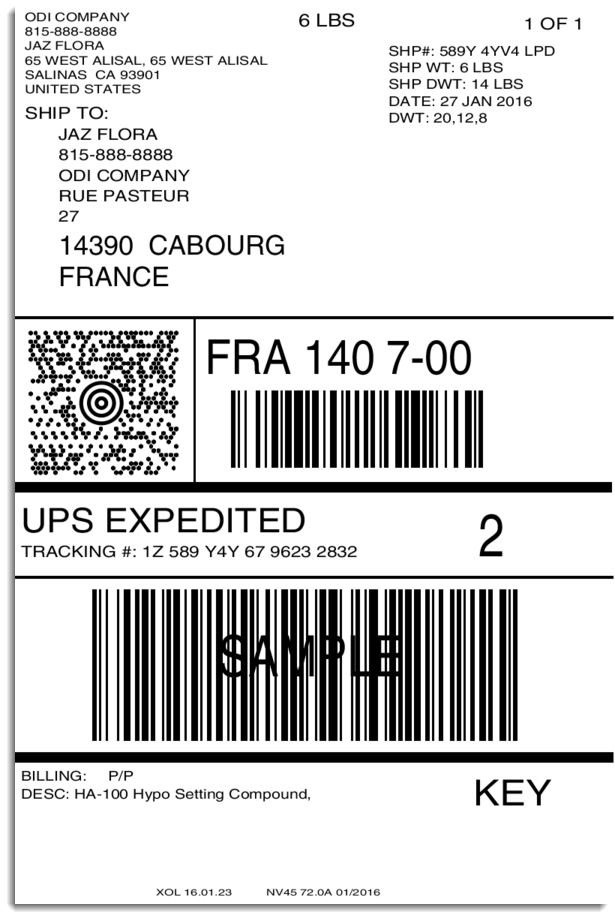
With the UPS plugin, you can also print labels (shop owner to the customer and vice-versa) for international shipping. The sample of an international label is as shown below:
Setting up UPS Shipment Tracking
To get the shipment tracking information, the customer can go to My Account. Under Order, click required #OrderNumber, and the tracking information will appear as shown below:
![]()
However, as soon as the order is completed, the plugin also sends the tracking details to the customers via the Order Completion Email, as shown below.
![]()
Click Shipment ID (highlighted) to see the status of the package.
I am using a thermal printer. How do I print the label correctly?
Customer :
I am using a thermal printer and the Google Chrome browser. I can print the label, but it prints on four pages and is sideways. I cannot figure out the settings to make it print in the right dimensions and directions (landscape vs portrait) to the printer.
PluginHive Support :
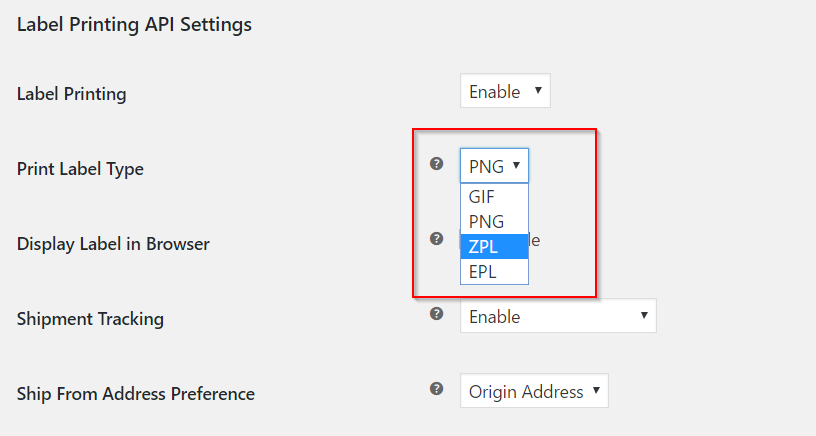
You need to activate ZPL/EPL format to print label correctly in a thermal printer. For this, select ZPL or EPL as the option for the field “Print Label Type” in plugin settings.
Then try to print the label. For the right printing dimensions, you need to check the printer settings on your system.
Also, since you are using Chrome, you can check the print options of Chrome using ‘Ctrl + p’ on your keyboard. Then go to ‘More’ settings to configure printer settings correctly.
You can print a label using our plugin on the order page. Please find the quick steps to print a label below:
Once an order is placed on your store,
- Go to WooCommerce> Orders> select the order number.
- Select the required UPS service, for printing the label from the UPS Shipment Label box.
- Click Confirm Shipment button, then accept the shipment.
- Now you will see a Print Label button.
- Click that, and you’re done!